How to setup DHCP server in MikroTik?
Setting up a DHCP server on a MikroTik router can be done via the Winbox graphical interface or the command line interface (CLI). Open and connect to the router using Winbox.
-
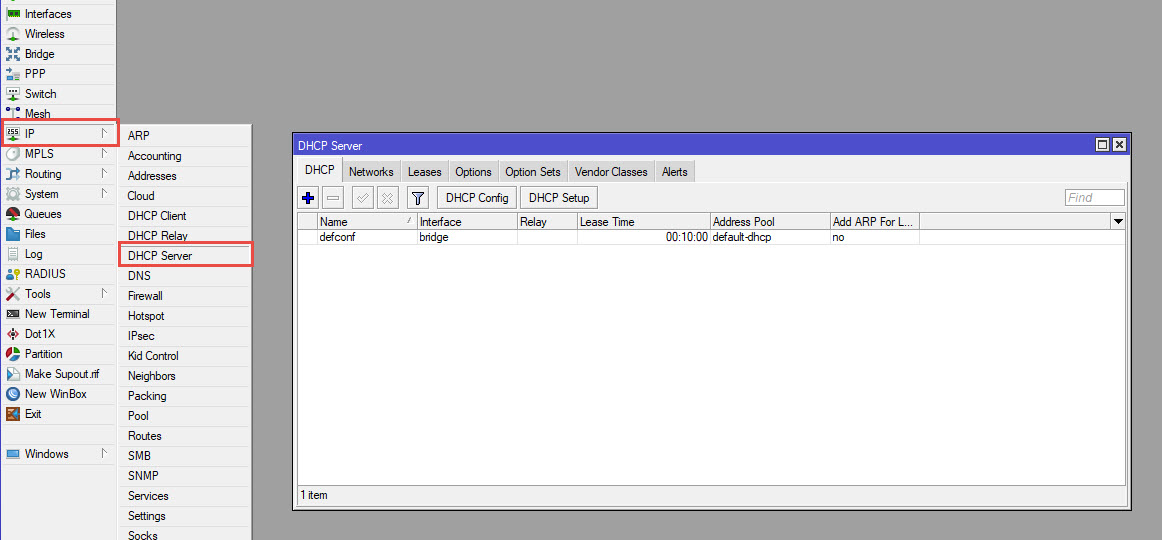
Navigate to IP > DHCP Server:
-
Go to IP in the menu on the left.
-
Click on DHCP Server.
-

-
Add DHCP Server:
-
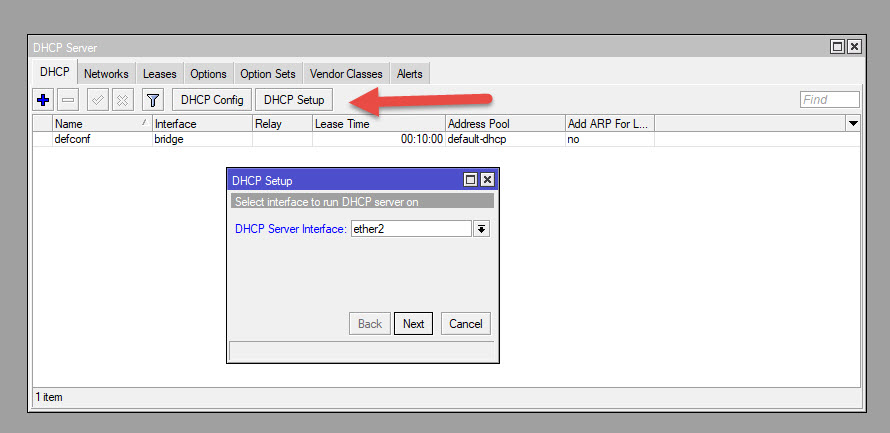
Click on the DHCP Setup button.
-
Select the interface on which you want to run the DHCP server (e.g., ether2).
-
Click Next.
-

-
Configure DHCP Server Parameters:
-
DHCP Address Space: Enter the IP address range that the DHCP server will assign to clients (e.g., 10.0.12.0/24). Click Next.
-
Gateway for DHCP Network: Enter the gateway IP address (e.g., 10.0.12.1). Click Next.
-
Addresses to Give Out: Enter the range of IP addresses to be given out by the DHCP server (e.g., 10.0.12.200-10.0.12.240). Click Next.
-
DNS Servers: Enter the DNS server addresses (e.g., 8.8.8.8, 8.8.4.4). Click Next.
-
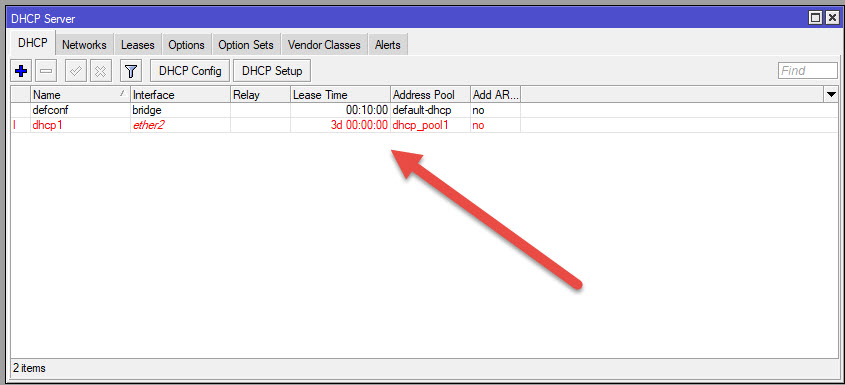
Lease Time: Specify the lease time for the DHCP addresses (e.g., 3d 00:00:00).
-
-
Finalize and Apply
