Run Cucumber Selenium project and see result.
Congratulations, now you are in final stage. This session we will run the full project and see the output, after that we browse the test result.
How to Run Cucumber Selenium project using gradle.
-
From Projecs find the file called build.gradle.
-
There will be a task called cucumber, run this task clicking on left side run icon.
If you follow the full tutorial step by step and everyting goes well then now you are seeing one browser open automatically and doing task according the Gherkin feature definition.
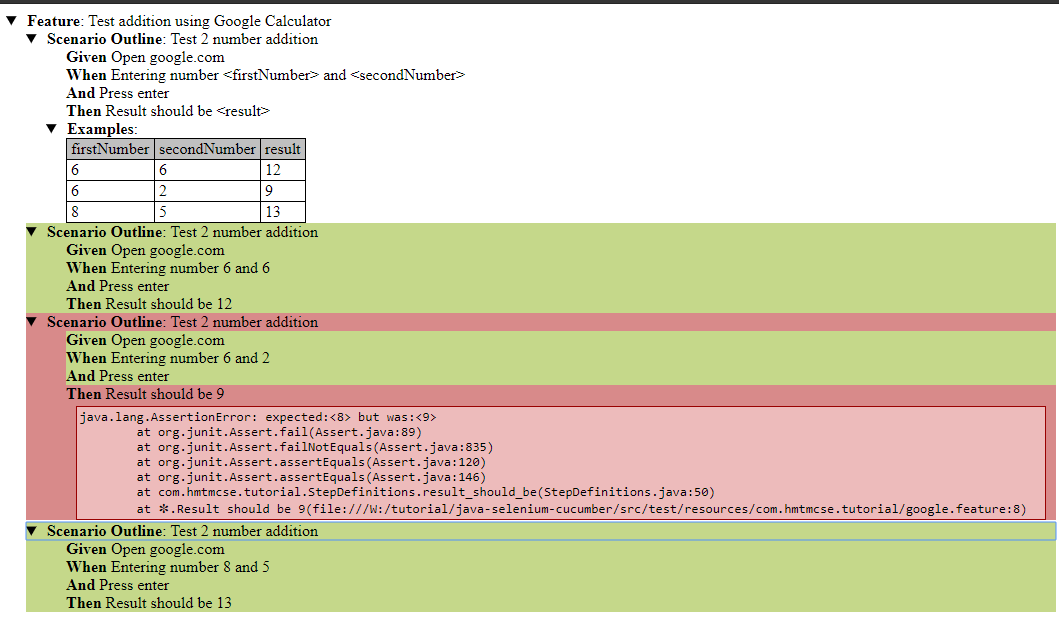
Observe Cucumber Selenium Automated test report.
Did you remember the Feature file exmaples step where we define 2 number and result.
    Examples:
      | firstNumber | secondNumber | result |
      | 6           | 6            | 12     |
      | 6           | 2            | 9      |
      | 8           | 5            | 13     |
Here second example is wrong calculation 6 + 2 != 9 that’s why it should be failed the step.
Output of Cucumber Selenium Automated test report.

Report also showing that the second example failed.